The Address Book Module allows Operations personnel to place orders in the cart on behalf of others. Examples of Operations personnel are as follows:
•Buyers
•Purchasing Managers
•Customer Service Reps
•Any personnel at your company responsible for taking phone orders.
If your company receives orders from customers via phone or fax and you enter the orders one after another the Address Book completely disables all cookie and session variables the cart uses to retrieve and populate customer information from the previous order and uses the customer information selected in the address book to pre populate the checkout screens saving data entry time and allowing your company order takers to process orders in half the time.
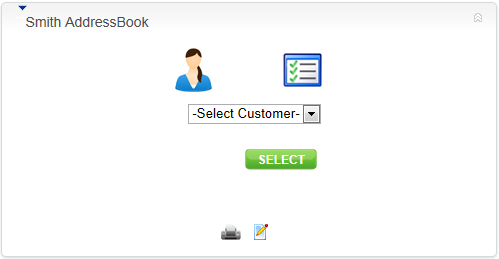
The following is a screen shot of the address book module when you are logged in to your DNN portal and a member of a role with edit permissions on the page or module.
The Address Book module provides the ability for the Store Admin to add, update and delete the following customer “Ship To” information:
a. Company Name (Buyer)
b. Customer First and Last Name
c. Customer “Ship To” Address
d. Email and Phone Number
e. DNN login, password and confirm password.
f. When the Store Admin saves a new customer record using the Address Book module a DNN profile is automatically create the customer.
The following steps describe how to setup the Address Book module:
Step 1 – Add the module to a page
Login as a portal admin and add the address book module to your page
Step 2 – Configure the module settings
Click the settings button to load the module settings

The following Address Book module settings screen will load:
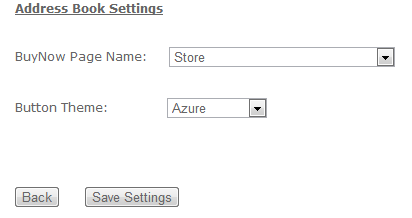
BuyNow Page Name– Select the page where you have added the BuyNow module. This tells the Product Detail module which page to navigate to when the user clicks continue shopping or add to cart.
Button Theme – The cart comes with the following eleven professionally designed button themes:
•Azure
•Black
•Blue
•Brown
•Forest Green
•Green
•Orange
•Red
•Silver
•Yellow
•Pink
Select the button theme that matches your portal skin the best.
Save Settings
Step 3 – Create Buyer DNN Roles
Hover your mouse over the DNN Admin menu and select “Security Roles”. The following screen is displayed:
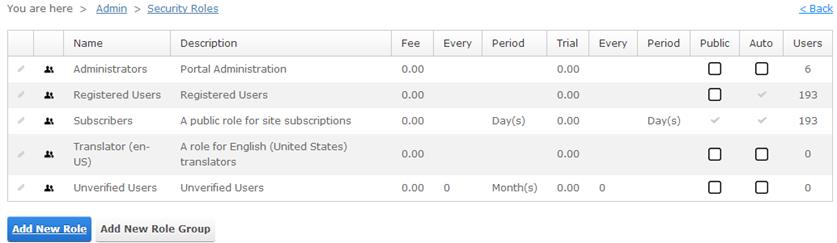
The Smith Address Book module requires that Buyer roles start with “SCBuyer”.
For example:
•SCBuyer1
•SCBuyer2
•SCBuyer3
•SCBuyer4
•Etc. etc.
Click the “Add New Role” link to create your new “SCBuyer” roles. If you only have one buyer placing orders on behalf of customers you only need to create a single SCBuyer role.
Step 4 – Create Buyer DNN Accounts
Hover your mouse over the DNN Admin menu and select “User Accounts”. Create all the DNN accounts for your Buyers that will place orders on behalf of others. Alternatively, you can ask the Buyers to create their own DNN accounts in your DNN portal by clicking on the “Register” link and create an account as a normal user would do when creating an account in your DNN portal.
If the Buyers already have registered and created DNN accounts in your portal you can skip this step.
Step 5 – Assign Buyer DNN Accounts to SCBuyer Roles
From the User Accounts screen (same screen from Step 4) click the “Manage Roles” button next to your first buyer user account as follows:
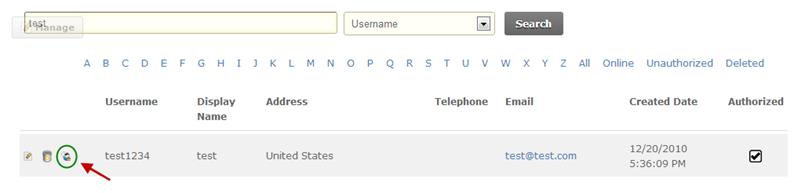
The following screen will be loaded:
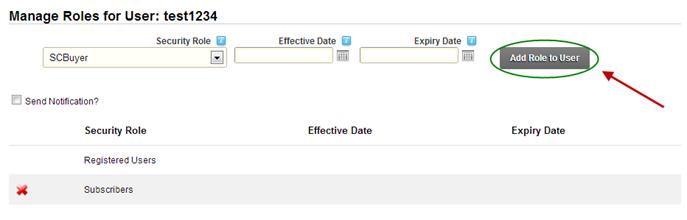
Select the “SCBuyer” role you created and click “Update User Role”. The Buyer will now be a member of the “SCBuyer” role.
Step 6 – Add Customer “Ship To” Addresses and Assign to SCBuyer Role
Click the “Manage Customers” button below to create customers:

The following Customer Address Book screen will load:

Enter all the customers your buyers will be placing orders for. Enter the customer’s ship to information including the customer’s DNN login, password and select the Buyer Role of the buyer that will be placing orders on behalf of the customer you are creating.
Logoff as admin, you have completed the admin level configuration steps required.
Step 7 – Login to your Portal with Buyer DNN Account and Start Buying!
Login to your Portal using one of the DNN Buyer accounts you created in Step 4 above and navigate to the page with the Address Book Module. When you are logged in with a buyer account the Address Book module will look as follows:
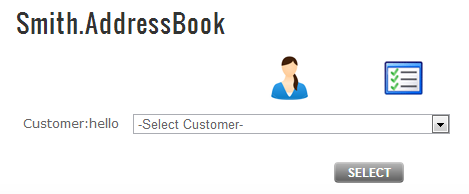
When logged in as a valid “SCBuyer” role you will notice the following differences in the Address Book module from when you are logged in as a portal admin:
•The “Manage Customer” and “Settings buttons will be hidden
•The customer dropdown list will be populated with the customers that are assigned to the logged in buyers role (SCBuyer)
From the dropdown list, select the customer you want to place an order for and click the “Select” button to load the customer’s ship to address into session (memory).
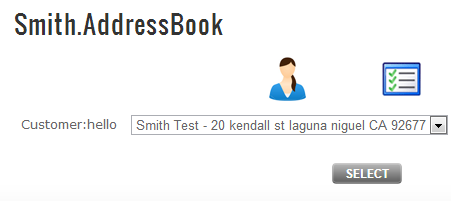
Next, navigate to the page with the BuyNow module and start adding products to the cart and checkout. You will notice that the customer’s information you selected from the address book module will be automatically populated in the checkout screens saving your company a lot of data entry time!