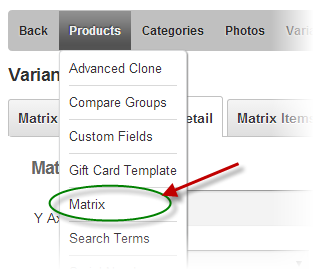
To add a matrix for a product click on the “Matrix” button in the top navigation of the product setup screen.
The first screen that is loaded is the “Manage Matrix Header” page. The following is a screen shot of the Manage Matrix Header screen:
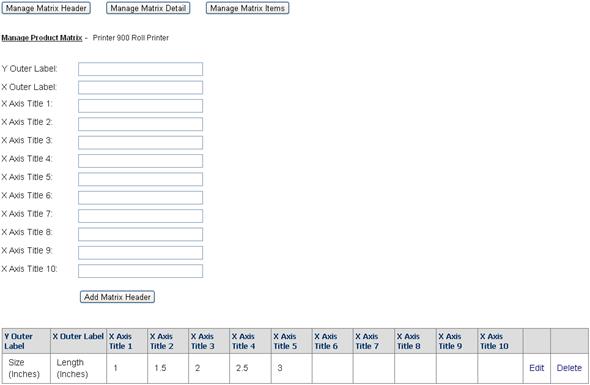
Figure 20 - Manage Matrix Header Screen
Enter one or two rows of titles for the product variant matrix. After entering the matrix title information click the “Add Product Matrix Header” button to save.
Y Outer Label/X Outer Label – Defines a label that is display outside the matrix to define the X and Y axis values. For example, If you are building a parts matrix and the Y Outer Label defines the size of your part and the X Outer Label defines the length of your part you would enter “Size” as the Y Outer Label and Length as the X Outer Label.
X Axis Title 1-10 – Defines the first row titles of your matrix.
Manage Matrix Items:
Before you build the detail of your matrix you will first need to define the product variant items. Click the “Manage Matrix Items” button at the top of the page to load the manage matrix items screen.
The following is a screen shot of the Manage Matrix Items screen:

Enter all your unique product variants you want to show up in the matrix. After entering the matrix item information click the “Add Matrix Item” button to save.
Sku – Enter your product sku or model number in this field. The product sku is typically a unique number that identifies your product for inventory purposes.
Quantity on Hand – The quantity on hand field is used to manage your available inventory for your product. Enter the current available product variant quantity you have available in your inventory.
Price – The price is the cost you want to charge for your product variant item. Enter your product variant price here.
Matrix Item Notes – The item note will be displayed in the pop-up window. Uses the rich text editor and supports regular text and HTML.
Manage Matrix Detail:
The last step is to build the detail cells and rows of your matrix. Click the “Manage Matrix Detail” button at the top of the page to load the manage matrix detail screen.
The following is a screen shot of the Manage Matrix Detail screen:

Figure 21 - Manage Matrix Detail screen
The manage matrix detail screen above allows you to add, edit and delete product rows in the matrix.
Y Axis Title - Defines the left most title column of the matrix.
Sku 1-9 – Define individual cells of the matrix. When in add or edit mode the sku is a dropdown list where you can select the items that you defined in the “Manage Matrix Items” section above. .
After you are finished creating your product variant matrix click navigate to the product details page for the product and you will notice a new tab titled “Matrix” in the tab control where the product description is displayed.
The following is a screen shot of the matrix on the Product Details page in the front end of the cart:
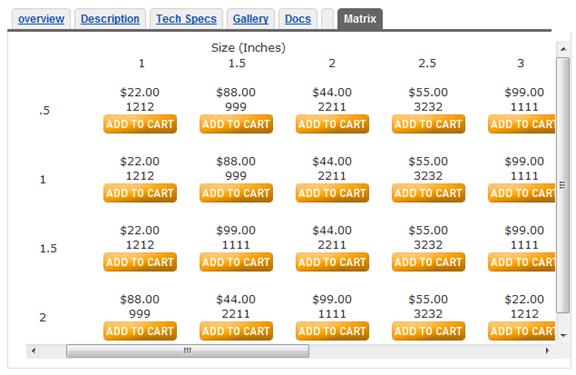
Figure 22 - Matrix on the Product Details page
The matrix supports two x axis titles and one y axis title, ten product matrix columns and unlimited product variant matrix rows. When a user clicks on the “Add to Cart” button for a variant cell in the matrix the item they clicked on will be added to the cart.
Matrix Window – In order to display a popup window from the product matrix, you must first enable the popup window in the Matrix Setup, as found in the Product Details Settings.

Once enabled, when a customer clicks the "add to cart" button, price, or quantity on hand in the matrix, a pop-up window is displayed.

When user clicks “Add to Cart” in the popup window the following happens:
•The item is added to the cart
•The popup window closes
•If you are using the mini cart the user stays on the product detail page and the mini cart updates to reflect the new item.